Miraplacid Screen Capture 1.0 Documentation
User's Manual
Contents
Installation
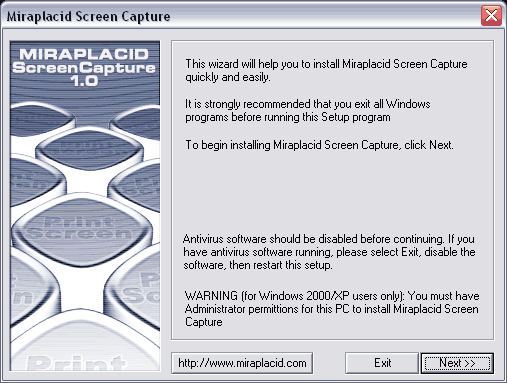
To install Miraplacid Screen Capture 1.0 follow these steps:
- Download Miraplacid Screen Capture 1.0 from http://www.miraplacid.com/products/mcap.shtml
- Unzip the downloaded file mcap.zip or run mcap.exe if you have downloaded self-extracting package
- Run Setup.exe (self-extracting package will run Setup automatically)
- Click "Next" button
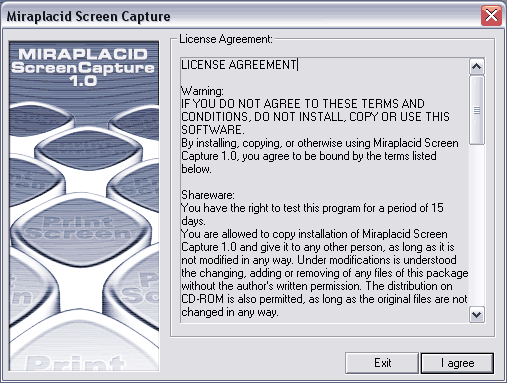
- Make sure you are agree with the license statement and click "I agree" button
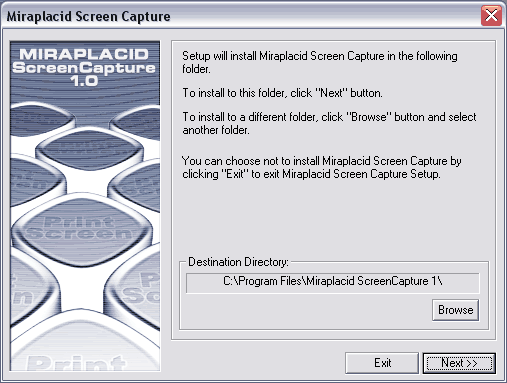
- To install to this folder, click "Next" button. To install to a different folder, click "Browse" button and select another folder.
- Click "Finish" button
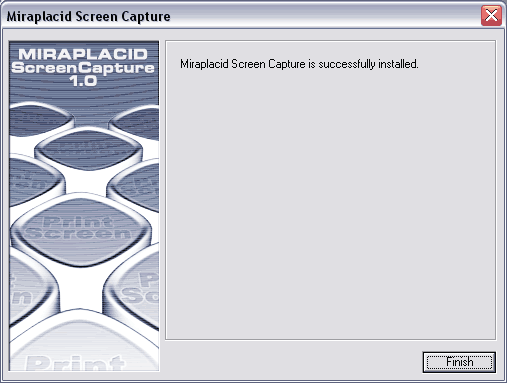
- Miraplacid Screen Capture icon will appear next to Clock in Windows System Tray

Additionally, shortcuts to Miraplacid Screen Capture will be installed to desktop and Programs folder of Start Menu.
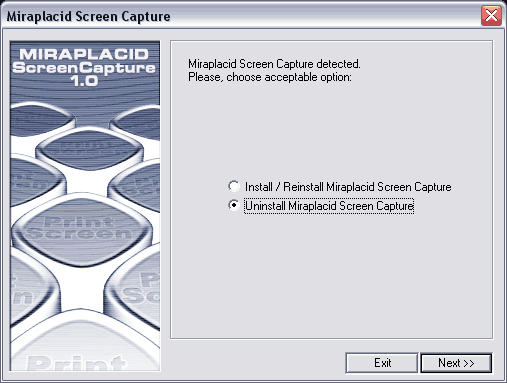
Uninstallation
To uninstall Miraplacid Screen Capture
- Run Setup.exe
- Click "Next" button
- In "Reinstall/Uninstall" dialog select "Unistall Miraplacid Screen Capture" and click "Next"
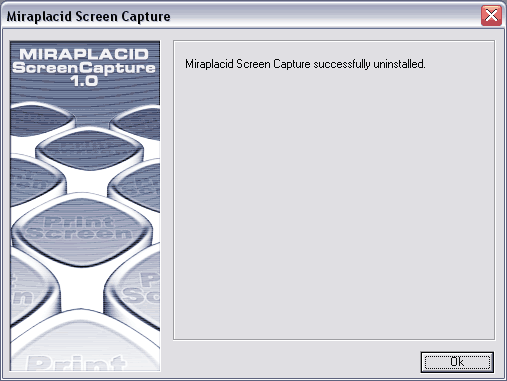
- Click "Ok". Miraplacid Screen Capture successfully uninstalled.
Miraplacid Screen Capture Settings
Miraplacid Screen Capture allows you to create custom configurations. You can have as many configurations as you need.
Miraplacid Screen Capture comes with following pre-defined configurations:
- TGA : High Quality Picture (640x480)
- TGA : High Quality Picture (800x600)
- TGA : High Quality Picture (1024x768)
- TGA : High Quality Picture (1600x1200)
- BMP (Bimtmap 24 bit RGB)
- TIFF CCITT Group 4
- TIFF CCITT Group 4 : Invert
- TIFF CCITT Group 3
- TIFF CCITT Group 3 : Invert
- TIFF CCITT Group 4 : Border Detection
- TIFF CCITT Group 3 : Border Detection
- TIFF CCITT Group 4 : Border Detection & Invert
- TIFF CCITT Group 3 : Border Detection & Invert
- JPEG : 0.8 Gamma (saving from IE)
- PNG : 0.8 Gamma (saving from IE)
- TGA : 0.8 Gamma (saving from IE)
- BMP : 0.8 Gamma (saving from IE)
- Printing: Prompt (ask for printer), 1:1
- Printing: Default printer, 1:1
- Printing: Prompt (ask for printer), Fit to page
- Printing: Default printer, Fit to page
- PDF : Grayscale (50%x50%)
- PDF : Grayscale (33%x33%)
- PDF : Grayscale
- PDF : TrueColor (50%x50%)
- PDF : TrueColor (33%x33%)
- PDF : TrueColor
Configuration page
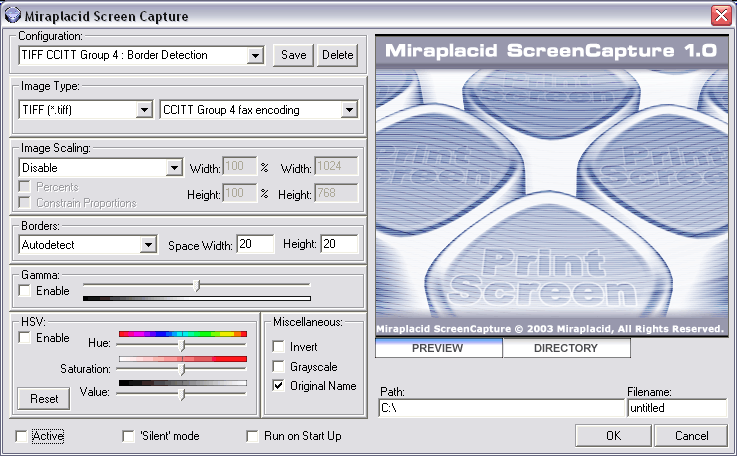
- "Configuration" - select pre-defined configuration or specify a name for
new one.
If you are going to re-use your current configuration in future - assign it an unique name and push "Save" button. To delete a configuration, select it and push "Delete" button. - "Image Type" - specify graphics format. Supported formats are: Windows Bitmap (.bmp), JPEG (.jpg), Targa (.tga), TIFF (.tif), PNG (.png).
- "Image Output" - format specific, image quality or compression algorithm settings.
To reduce file size, it is recommended to use JPG with 60% quality for pictures, TIFF CCITT Group 4 for black and white text document. - "Image Scaling" - scale the result image to desired size.
Choose "Bilinear scaling" for faster printing or
"Bicubic scaling" for ultra high quality results. Bilinear scaling is usually good enough.
- "Percents" checkbox - set scaled image width and height in percents if checked, in pixels otherwise.
- "Constrain Proportions" checkbox - scaling preserves image proportions if checked.
- "Width","Height" editbox - set desired image size in pixels or percents (depends on Percent" checkbox).
- "Borders" - clips off unused white borders in your document.
"Space Width" and "Space Height" - set border width and height to be preserved and saved with image. - "Gamma Correction" - make the image darker of brighter. You can turn this feature on or off with "Enable" checkbox.
- "HSV" - Hue/Saturation/Value control.
- "Miscellaneous" - "Original Name" - do not add "1" to the end of file name for the first screenshot. You can turn on or off number for the first page.
- "Miscellaneous" - "Grayscale" - convert image to grayscale.
- "Miscellaneous" - "Invert Image" - invert image colors.
- "Active" - using this checkbox you may temporary disable Screen Capture and use default PrintScreen processor,
then re-enable it.
When disabled, Screen Capture tray icon changes:

- "Silent mode" - when checked, screenshots will be generated without popping-up the dialog.
- "Run on StartUp" - add Miraplacid Screen Capture to Windows System Tray when Windows starting up. If you have turned this option off, you may launch Miraplacid Screen Capture at any time by clicking the icon on your desktop or from Start Menu.